Monday, December 26, 2011

beefy cheesy noodle-y casserole

Today's recipe is one that I created-no internet searches or Pinterest finds for this awesome casserole! It is easy to make and one of our favorites!

what you'll need:
  • 1 lb. ground beef
  • about 2 cups sharp cheddar cheese
  • 1 can Campbell's cheddar cheese soup
  • 1 package egg noodles (dumplings)
  • generous splash of milk
  • 2 dollops of sour cream
  • spices to taste
  • 1 package of crescent rolls
how you'll do it:
  • preheat oven to 350*
  • boil the egg noodles
  • brown the beef
  • drain beef and rinse off, drain noodles
  • pour some milk in the pot in which you cooked the noodles, then put the noodles and beef in the pot

add cheese, soup, and sour cream and mix well
add spices: I use mrs. dash, nature's seasoning, and dill

[add more milk a little at a time if needed to ensure creaminess]

pour in 9x13 casserole dish

unroll crescent rolls and lay on top for crust

Bake until crust is golden brown. Enjoy!

Variations:
  • When I first made this casserole, I used ground beef (hence the name) but now I usually use ground turkey.
  • Add various types of cheeses
  • Use different shapes of noodles, i.e. rigatoni, bowtie, etc.

Friday, December 23, 2011

alfredo sauce

Fettuccine Alfredo is one of my favorite meals, and I decided to make some for supper the other night. Instead of buying a jar of the Alfredo sauce (that isn't really that great anyways), I made my own thanks to a good recipe I found searching the internet. It's real simple and very tasty!

what you'll need:
  • 4 oz. Parmesan cheese, grated
  • 1 8 oz. block of cream cheese
  • 1 stick of butter
  • 1 1/2 cups milk
  • salt, pepper, garlic to taste
how you'll do it:
in a medium skillet, melt butter on medium heat
when butter is melted, add cream cheese and separate in chunks


keep stirring cream cheese and butter until cream cheese breaks down more
then add cheese and use whisk to stir

when it starts to get smooth, begin to add milk a little at a time

keep adding milk and add salt, pepper, and garlic, whisking until completely smooth

here is my final product: 
Fettuccine topped with Alfredo sauce and grilled chicken..yum!

Viola! Now you can add some flavor to your next Italian meal.

*Please note, this recipe makes a skillet FULL of sauce, probably enough for 6+ people (which may be what you need) but for just the 2 of us, I'll be half-ing this recipe next time.*

Tuesday, December 20, 2011

button initial

I found a real cute button initial that I like on Pinterest and I thought I'd make some for my little cousins for Christmas. You can find my inspiration here.

what you'll need:
  • thick cardboard
  • hot glue & gun
  • buttons (lots of them)
  • fabric 
  • puffy paint (in a color that complements the fabric)
  • scissors
  • letter printed out
how you'll do it:
  • first you'll need to decide what font you want to use and print out a single letter in it in a very large font (like 500px+)
  • *very important: turn the paper over and trace the outline of that letter
cut out 2 pieces of cardboard in the size that fits the letter

hot glue the pieces together

cut the fabric in a size that can comfortably wrap completely around the cardboard

*iron out any wrinkles in the fabric before going any further* 
now lay the cardboard on the fabric like above and hot glue the back and front edges, the hot glue the fabric seam on the back (just like taping a present)
next, fold the ends of the fabric like a present and glue to the back
back to the letter

put buttons face-down on the back side of the letter

put a little puffy paint on each button, then 
I used 2 hot glue sticks as guides to show the top and bottom of the letter

turn your fabric face down and press onto the letter, then turn over

Hot glue ribbon on the back top 2 corners for hanging and you're done! 
Variations may include:
  • using tacky glue that dries clear if you don't want the color of the puffy paint to show through
  • taking the time to hand stitch each button onto the fabric
  • using canvas instead of cardboard
  • using colored buttons*
*Side note, if you want a lot of buttons in a certain color, dye them! That's right, you can dye "pearl" or white buttons to your desired shade with Rit dye. Just put the dye in a cup or bowl and soak your buttons for the desired shade!

Sunday, December 18, 2011

cherry cordials

I have found that most people have some kind of treat that they make each Christmas as a tradition. For example, my Mom makes the world's best chex mix (sorry to all you other chex mix makers out there; it's just a cold, hard fact). When I was growing up, my neighbors always made hard candy. Some people make chocolate covered cherries, other choose to spend their time making fruit cakes.

A few years ago my parents were hosting a Christmas party for lots of neighbors and friends, and I was trying to figure out what kind of Christmas goodies I could make. I stumbled across this recipe and it's been "my" Christmas treat ever since.

Now, before you look at this recipe, see that it is a long process and run away with your tail tucked, wait. Yes, it is an all-day kind of thing. Yes, it is very involved. Yes, it is worth it. From what I hear, those red boxes of cordials that you buy every year around this time haven't got anything on these.

Let's proceed.

what you'll need:
  • 2 cups confectioner's sugar
  • 3 Tbsp. butter, melty/softened
  • 3 Tbsp. corn syrup
  • 3 jars maraschino cherries with stems
  • baker's milk chocolate
  • mini cupcake tins
how you'll do it:

in a medium/large sized bowl, combine butter and
corn syrup until the mixture is cloudy

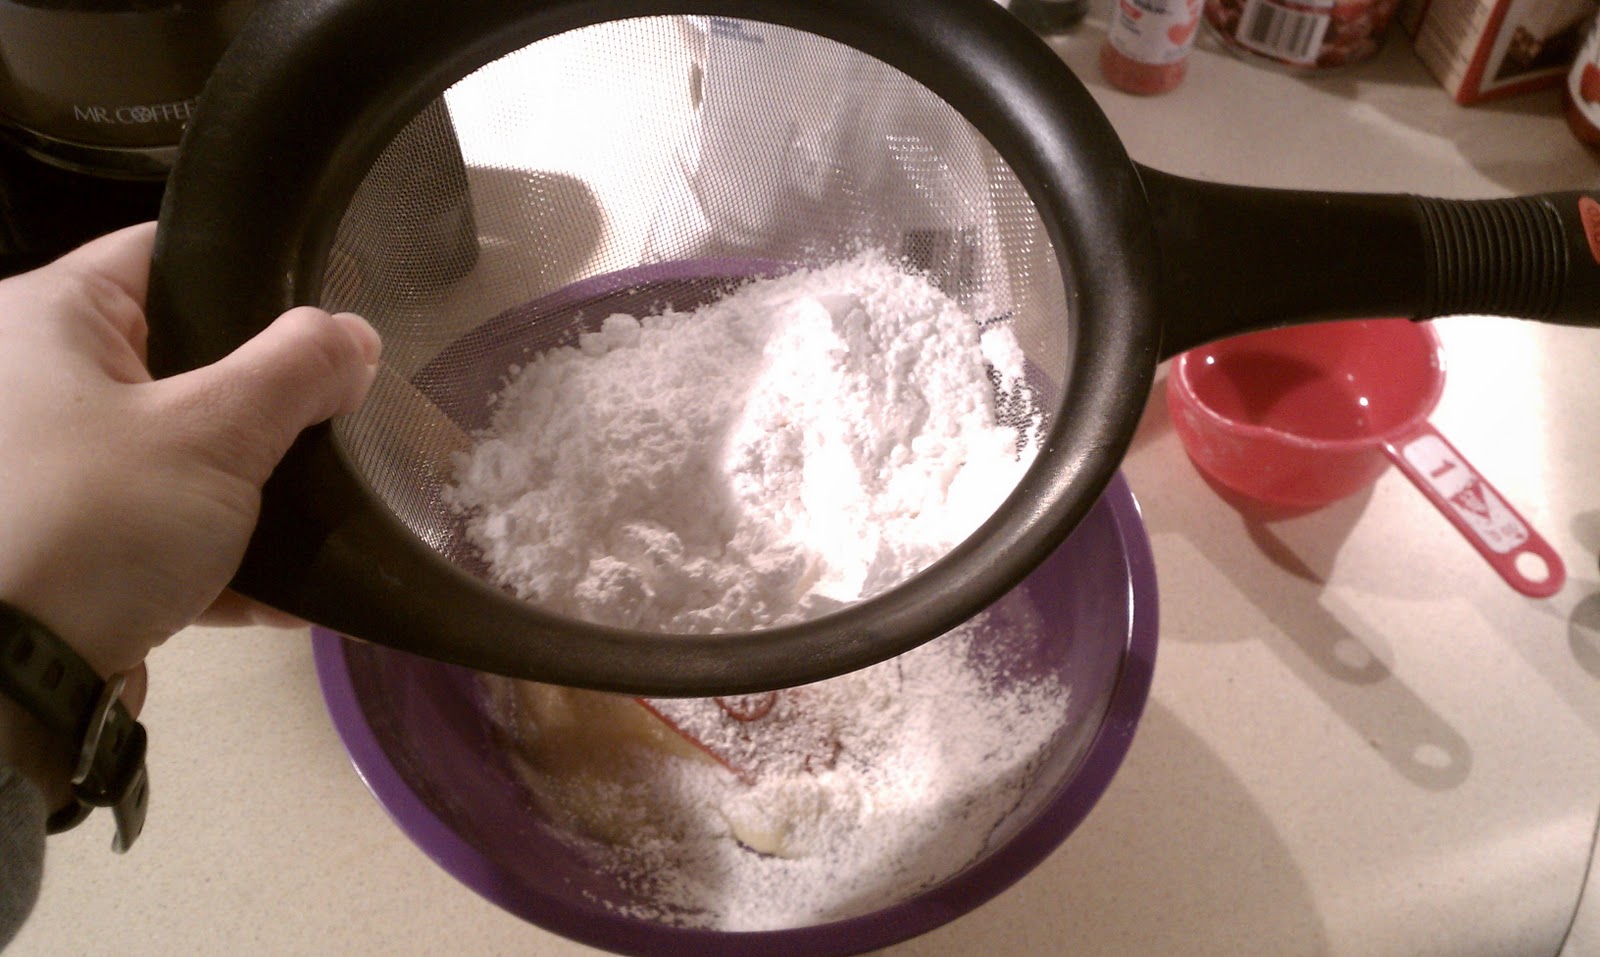
sift your sugar into the bowl

combine with your spatula. once you have hit the point
where the dough is flaky and not sticking together, use
your hands to start kneading it. make a dough ball

put your dough ball in the fridge to harden

while that's hardening, pour the juice out of your cherries
and lay them on paper towels on your counter to dry a little

line a cookie sheet with wax paper to put the cherries on when wrapped
after the dough is hard, get it out and begin wrapping the cherries with it

pinch off just enough to cover the cherry and make it into a ball

flatten it out

cover the cherry with the dough

seal it around the stem

  • put the cherries in the fridge to harden before coating with chocolate
  • in the meantime, set out mini cupcake tins on the counter
[Okay, time for a side note here. Normally I use a double boiler to melt the baker's chocolate. But this was my second round of cordial making and I found a little gym that I had forgotten all about: my "Little Dipper." It came as a bonus with the crock pot I got as a wedding present, and it works wonders. So this time, I melted the chocolate in it and dipped the cherries.]

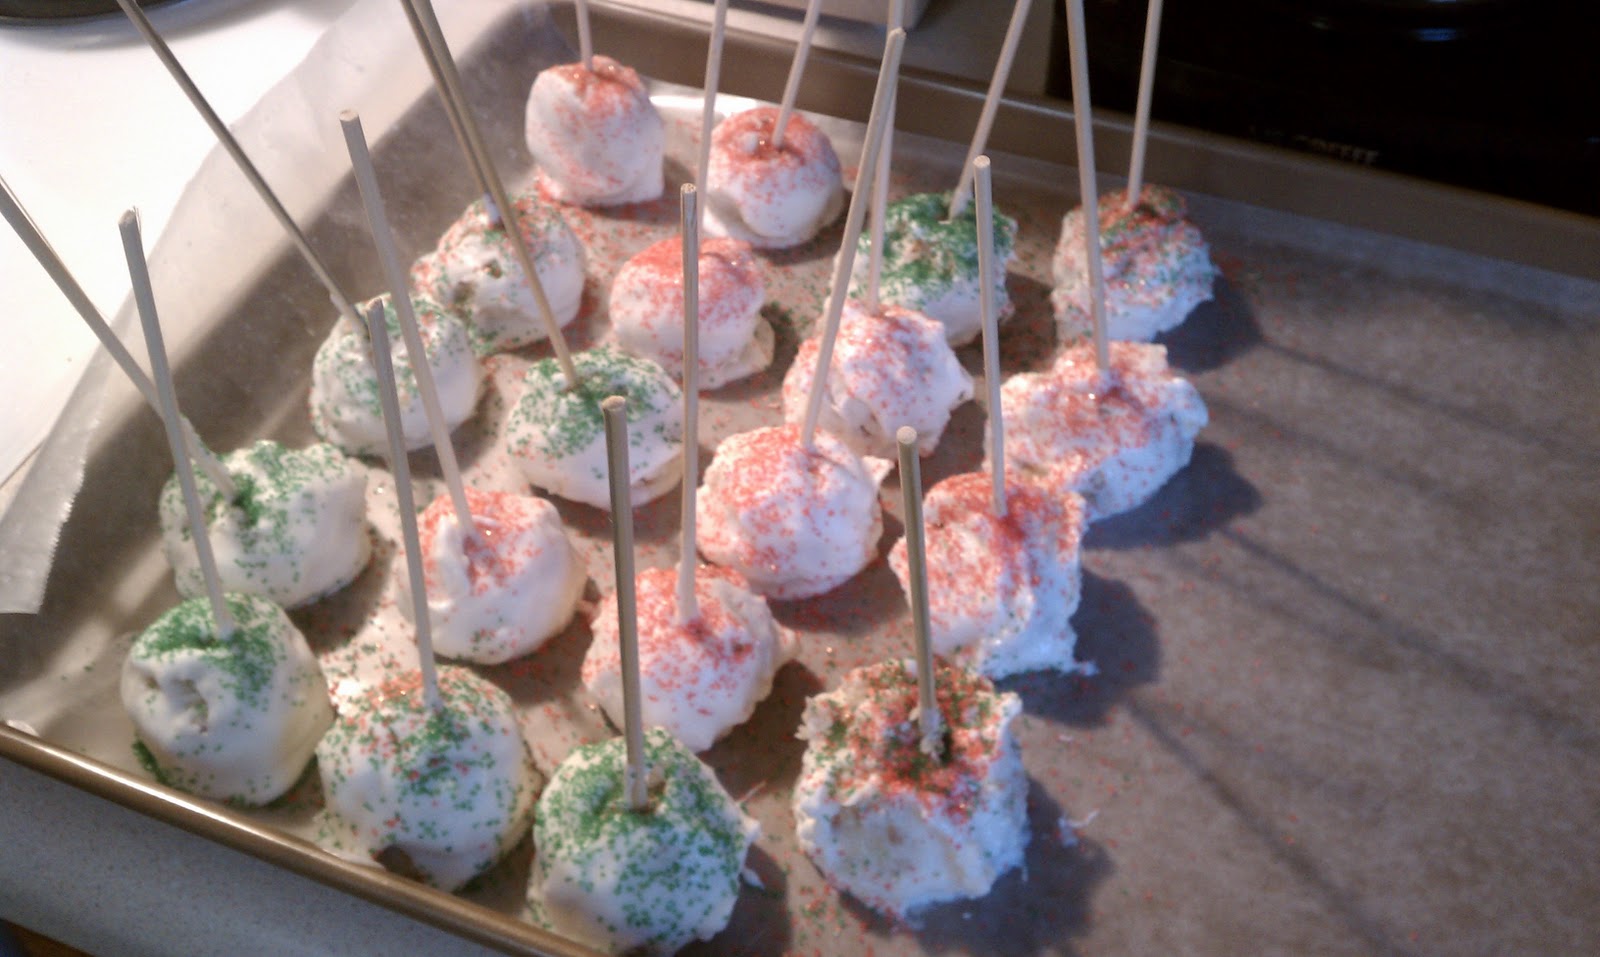
holding the stem, drag the cherry through the chocolate


place in mini cupcake tin


Viola! And now you know the secret behind those like nuggets of goodness. Now for the hardest thing that I must tell you about these cordials. Are you ready?

They need to sit for 2-3 weeks for their awesomeness to set in.

I know, I just broke a few hearts. You can eat them now, but trust me, the longer they sit, the better they get. So I encourage you to let this be some practice in self-control. ;) Enjoy!

Wednesday, December 14, 2011

black forest brownies

Looking for a tasty treat in a fun size? Look no further. Mom's delicious black forest brownies are a hit, and I'm so excited to share them with you here.

Tomorrow, Ryan and I are going to a Christmas party tomorrow with his coworkers and when Ryan told me we needed to bring something to eat, this was the first dessert that came to mind!

what you'll need:
  • family size brownie mix
  • can of cherry pie filling
  • foil muffin tins
how you'll do it:
  • preheat oven to 350*
  • prepare the brownie mix in a large bowl according to directions on box
place muffin tins in muffin pans and spray with nonstick spray

 fill muffin tins halfway with brownie batter

spoon 3 cherries into each muffin tin

cover with more brownie batter

put pan into the oven and bake until done!

Viola! How beautiful! And just wait until you taste them. Unfortunately, I am notoriously bad at setting timers, but I think that I baked these for about 30-35 minutes. And I used 2 boxes of brownie mix and a whole can of cherry pie filling for a yield of 24 brownie cupcakes.

How did yours turn out?

Monday, December 12, 2011

buffalo chicken dip

This is an awesome dip for parties, pot lucks, or for personal snacking. It's everything good about a chip dip combined into one: spicy, tangy, cheesy. And it's super easy to make and doesn't take much time at all.

what you'll need:
  • sharp shredded cheddar cheese (at least 2 cups)
  • 2 cans chicken
  • 1 cup buffalo wing sauce (I recommend Moore's)
  • 1 cup ranch dressing
  • 2 8 oz. blocks of cream cheese

how you'll do it:

put cream cheese in large microwavable bowl and microwave about 2 min.
then stir in chicken, wing sauce, and ranch

once mixed well, pour into 9x13 inch casserole dish

cook at 350* for about 20-25 minutes and then cover top with cheese

cook until cheese is melted but not brown or hard

Viola! I hope you enjoy this quick and easy snack!

Thanks to friends Twana and Maddie for this great recipe!

Sunday, December 11, 2011

cake pops

Well if you've been on Pinterest lately or any other site that offers holiday treat recipes, you may be familiar with cake pops. If not, allow me the pleasure of the introduction :)

Cake pops are super easy, albeit time-consuming, to make. Today, my friend Tessa and I made some together.

what you'll need:
  • 1 box cake mix
  • 1 can icing
  • baker's chocolate
  • sprinkles, if desired
  • wooden skewers
how you'll do it:
  • cut wooden skewers in half (these will be the sticks for the cake pops)
  • bake the cake according to instructions on box in 2 square or round pans
  • set the cake on cooling racks until cool
  • in a large [very large] bowl, crumble the cake
add can of icing to cake, stir until combined well in a thick consistency

using a small 'cookie dough' scoop, scoop out the cake/icing mix
  • put all cake balls in the freezer to harden
using a double boiler, melt baker's chocolate, put wooden skewer in cake ball and dip in the chocolate until covered
place on a wax-paper lined cookie sheet and add sprinkles

Viola! And as easy as that you have a fun and tasty treat to share!

For today's batch, we used strawberry cake and  icing. I have also used funfetti cake and icing. 
Other ideas for cake/icing combinations:
  • chocolate cake with chocolate icing
  • chocolate cake with vanilla icing
  • vanilla cake with chocolate icing
  • strawberry cake with chocolate icing
  • pumpkin spice cake with cream cheese icing
What kind of cake pops did you make?

Saturday, December 10, 2011

pork tenderloin in chive & onion sauce

Tonight's menu:
pork tenderloin over egg noodles with a mushroom, chive & onion cream sauce and a side of asparagus

what you'll need:
  • pork tenderloin, plain
  • egg noodles
  • 4 oz. chive & onion cream cheese
  • 3/4 cup chicken broth
  • fresh mushrooms
  • 2 Tbsp. canola oil
  • shake & bake, pork
  • fresh asparagus
how you'll do it:
  • preheat your oven to 400*
  • coat the tenderloin in the shake & bake, put in oven for ~30 min.
  • about 20 minutes later:
boil half bag of egg noodles until cooked

 put canola oil in skillet, add mushrooms, cook about 5 min.

 add cream cheese and chicken broth to mushrooms

simmer until smooth

 steam asparagus until tender
[the day I bought this the store was out of regular asparagus bunches, so I had to get the one in it's own steamer bag. whatever you want can work]

take pork out of the oven

put noodles on plates, cover with sauce, top with pork, add asparagus on side
 
enjoy!

Thanks, KraftRecipes for the tasty idea!

salsa

This afternoon I made homemade salsa. Let me take this opportunity to say: I love salsa. But I'm also very picky about my salsa. I don't like it too chunky, which seems to lead to the demise of finding good salsa at the grocery store (although there is a black bean & corn salsa that I've fallen in love with!). So after looking at a few recipes I found on Pinterest I decided I would try making my own.
Ingredients:
  • 2 cans diced tomatoes
  • 1 small can green chili peppers
  • about 1/4 onion
  • 1/2 bunch cilantro
  • 1 can whole kernel corn
  • salt to taste
  • garlic powder
  • red pepper flakes
You can of course change this recipe to your liking, or use more of each to make a larger batch. Next time I think I'll add black beans!

In your [beloved] food processor, add everything but corn. Pour into a bowl. Drain your corn and add to salsa mix. Viola!


I have a small, handheld food processor, so I mixed mine a little at a time, but if your food processor is big enough you can throw it all in there are once!


Here is the finished product!